








This guide explains how to access the Contacts section, add a new contact, verify the email address, and manage email preferences in the Prabhu Host Client Area. Verified contacts ensure you receive all important notifications related to billing, domains, support, and product updates.
Accessing the Contacts Section
You can find the Contacts section by navigating through your Client Area:
-
Log in to your Client Area:
https://portal.prabhuhost.com/clientarea -
On the left menu, under My details->Contacts.
This is where you can:
-
Add new contacts
-
Verify email addresses
-
Set email preferences
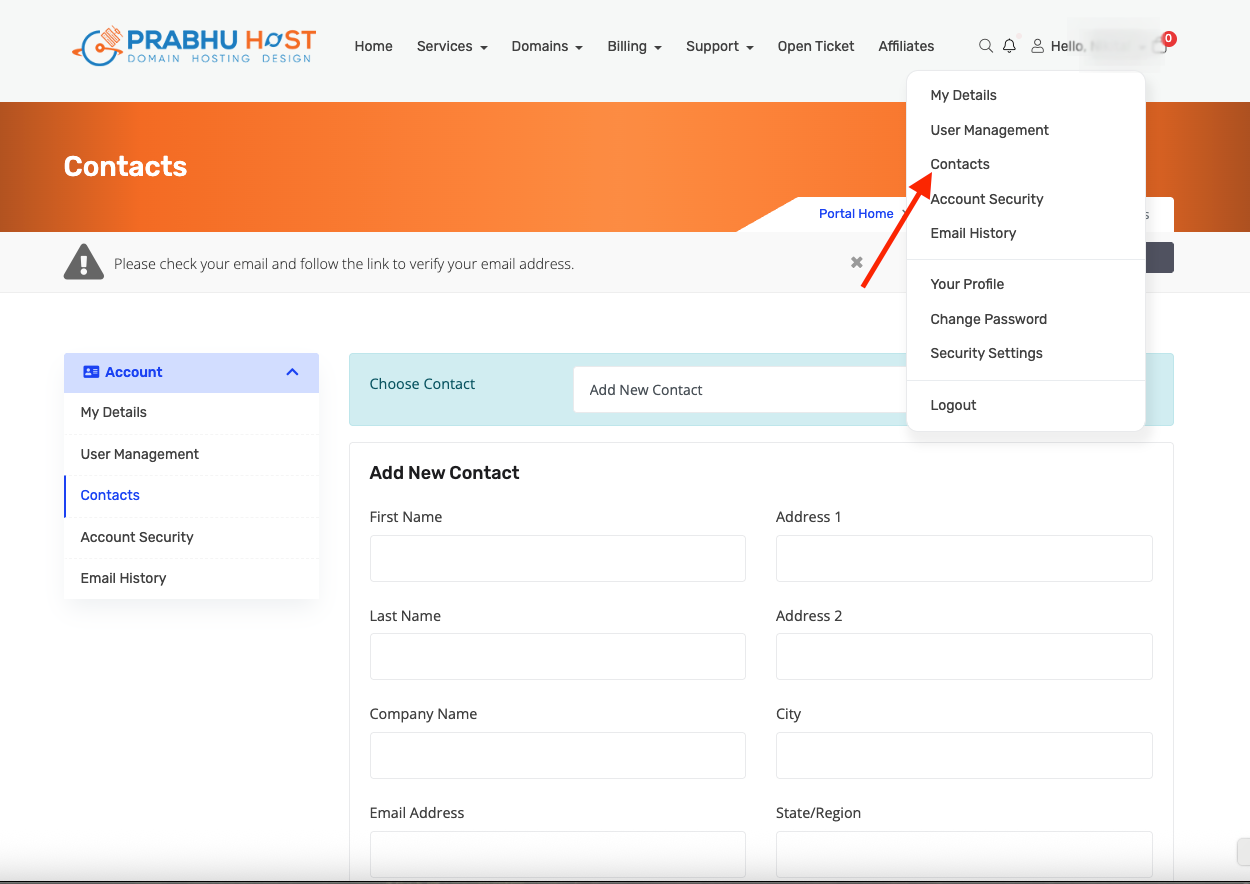
Why you may see this message
“Please check your email and follow the link to verify your email address.”
This appears when:
-
A new contact email is added
-
Email is not yet verified
-
System blocks notifications until verification is complete
Without verification:
-
Important emails (domain approval, invoices, tickets) may not be delivered
Steps to Add and Verify a New Contact
Step 1: Click “Add New Contact”
-
On the Contacts page, you'll see Add New Contact.
Step 2: Fill in Contact Details
Enter the following details:
-
First Name
-
Last Name
-
Company Name (optional)
-
Email Address (must be active)
-
Phone Number
-
Address details (optional)
Step 3: Save the Contact
-
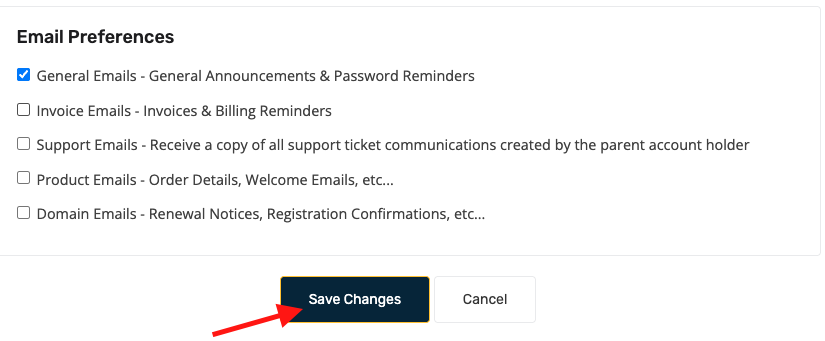
Click Save Changes to add the new contact.
Step 4: Verify Email Address
-
Check the inbox of the added email address
-
Click the verification link sent by Prabhu Host
After Verification
-
Contact becomes active
-
Email notifications will start working
-
Can be used for:
-
Domain admin contact
-
Billing notifications
-
Support communications
-
5. Manage Email Preferences
Once the contact is verified, you can select the types of emails to receive:
-
Choose the preferences that suit your workflow
-
Saves you from missing critical alerts
Important Notes
-
Always use an accessible email address
-
Avoid emails tied to the same domain if email service is unstable
-
Verification email may land in Spam folder
-
If not received, try resending verification
