


This guide explains how to check your current IP, update it in Cloudflare, and verify propagation.
1. Check Your Shared IP in cPanel
-
Log in to your cPanel account.
-
Navigate to General Information (on the right side of the dashboard).
-
Look for Shared IP Address or Server Information.
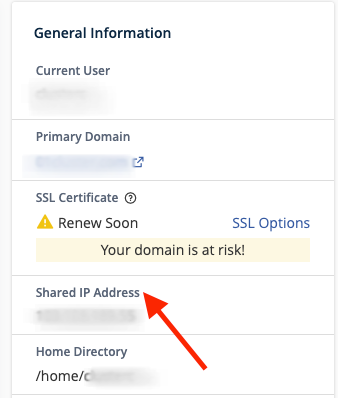
This is the IP you need to update in Cloudflare if your site is proxied through it.
2. Log in to Cloudflare
-
Enter your credentials and select the domain you want to update.
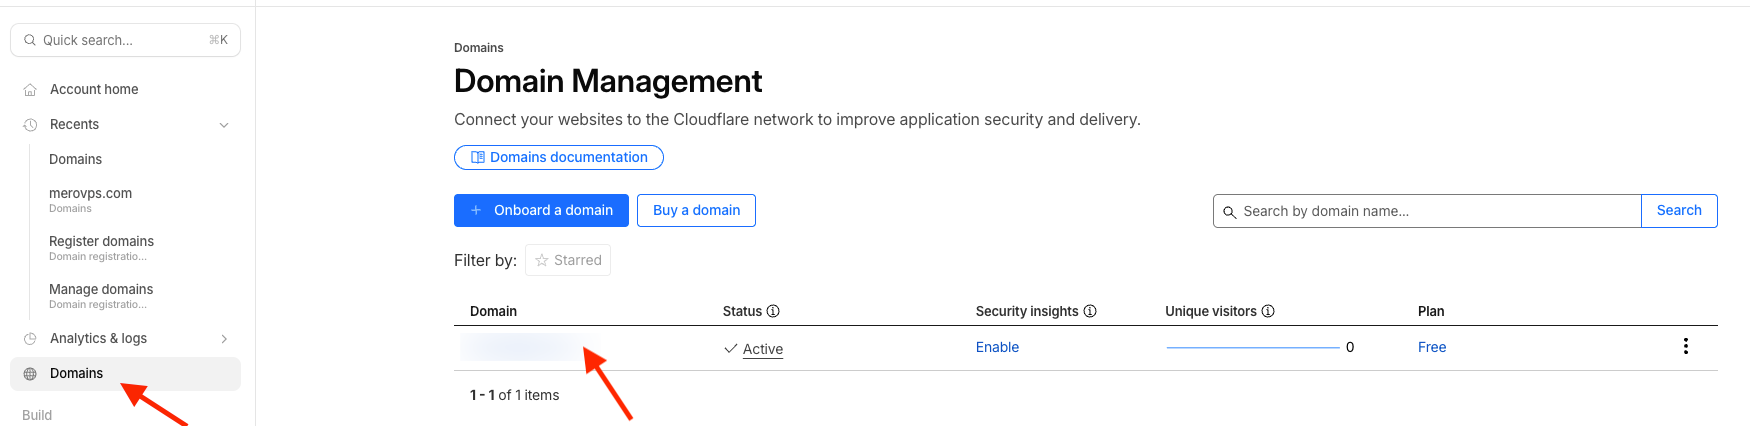
3. Update the A Record in Cloudflare
-
Go to DNS tab for your domain.
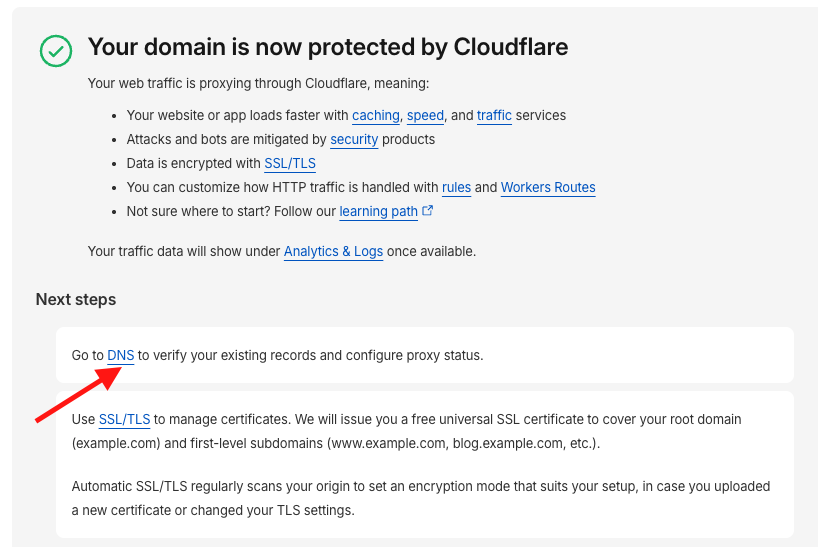
2. Locate the A record pointing to your old IP (usually @ or www).
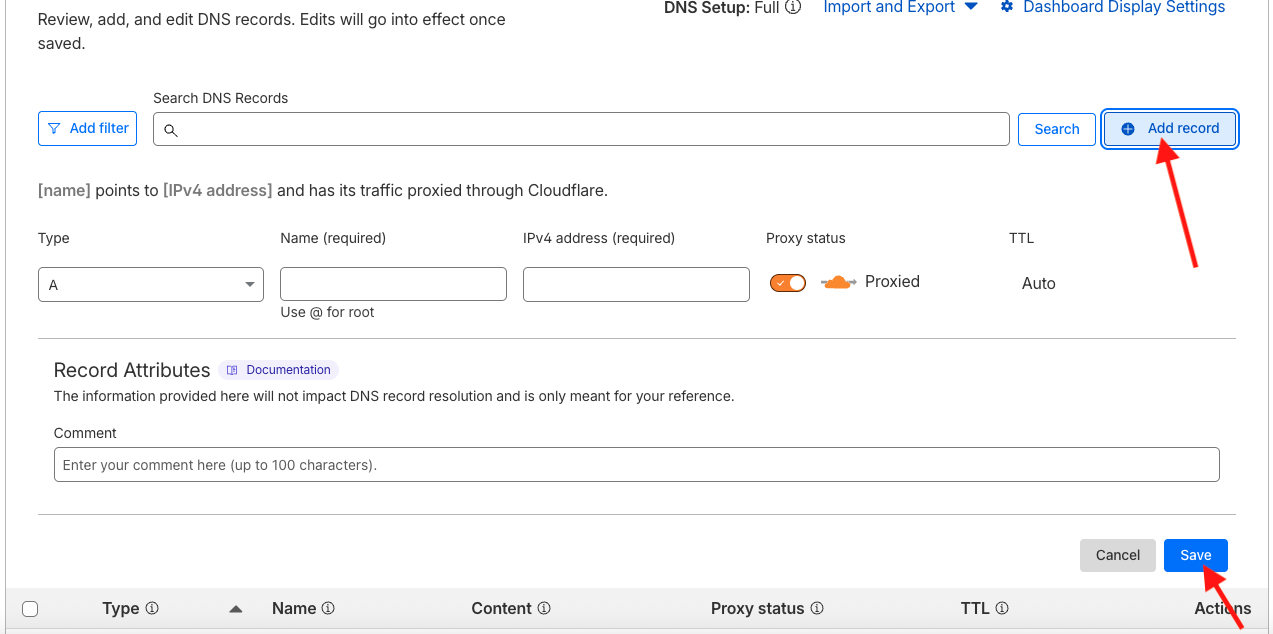
3. Edit the record:
-
Change the IPv4 address to the new IP from cPanel (e.g.,
209.42.27.16). -
Save the changes.
4. Verify the IP Update
-
Wait a few minutes for Cloudflare to update.
-
Use
ping yourdomain.comor an online DNS checker to confirm the A record points to the new IP.
5. Important Notes
-
Updating cPanel IP alone will not change public DNS if Cloudflare is active.
-
Cloudflare caches DNS, so propagation may take a few minutes.
-
Always check the cloud icon in Cloudflare:
-
Orange = traffic passes through Cloudflare (proxy + security)
-
Gray = traffic bypasses Cloudflare (direct server IP)
-
6. Troubleshooting Tips
-
If your site is not resolving after updating IP:
-
Clear your browser cache
-
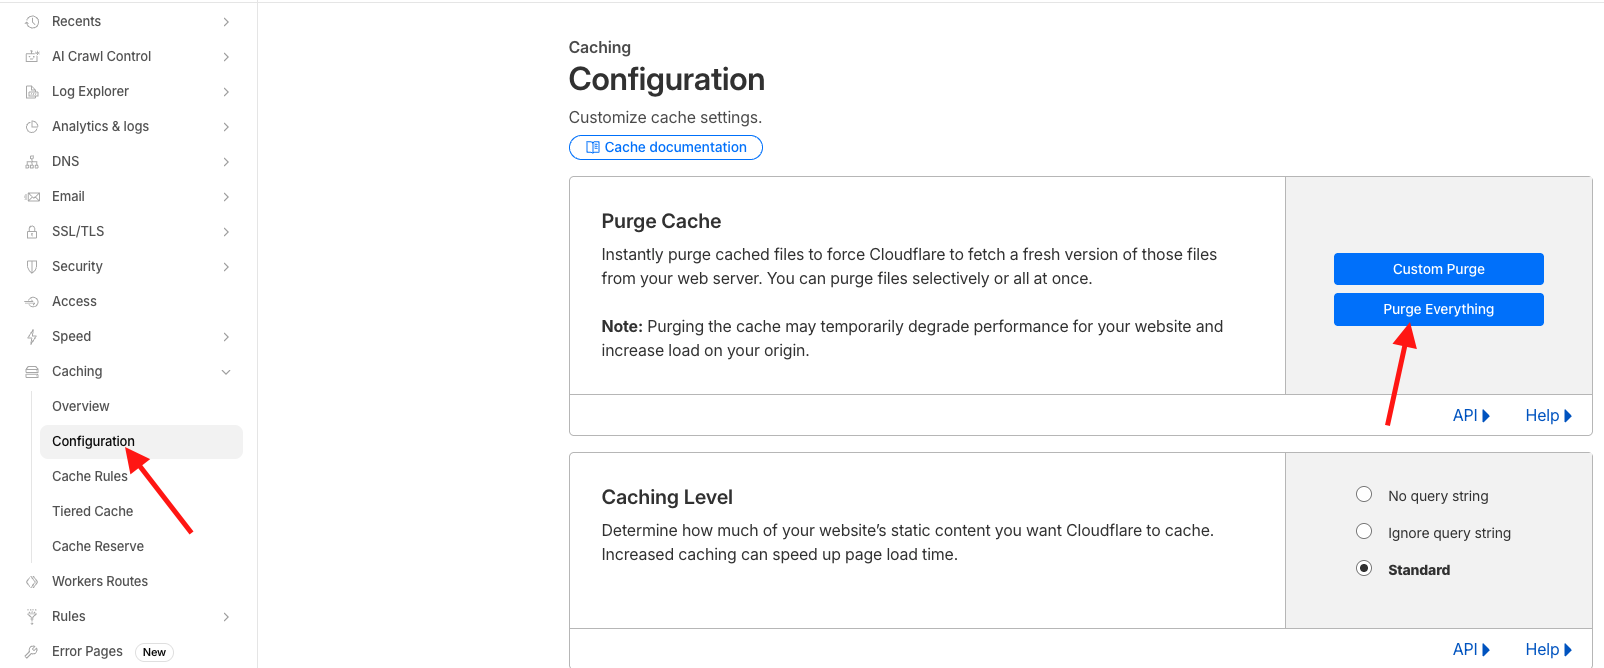
Purge Cloudflare cache from the Caching → Purge Everything option
-
Confirm there are no conflicting A records for the same subdomain
-