







Step-by-Step Guide
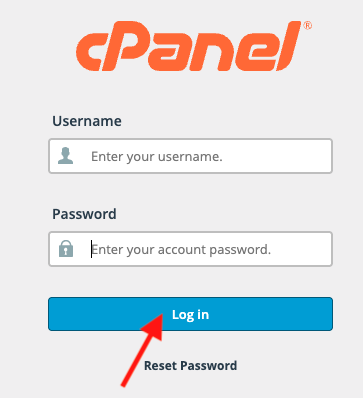
Step 1: Log in to cPanel
Step 2: Open Softaculous
-
Inside cPanel, scroll to the Software section
-
Click on Softaculous Apps Installer
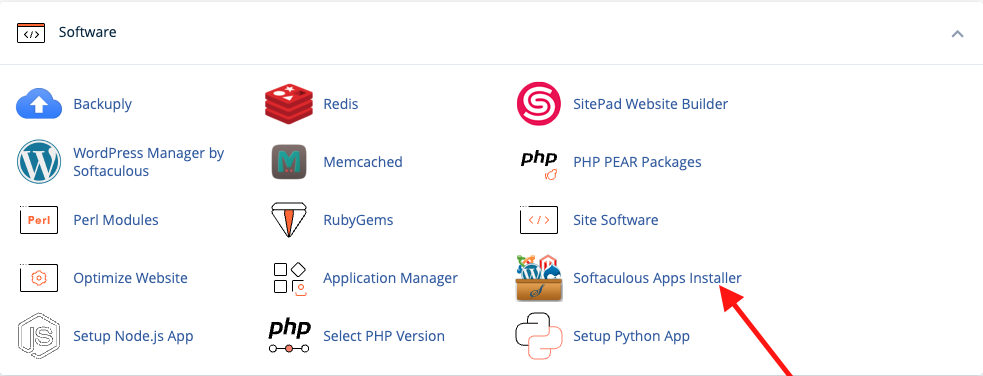
or directly click
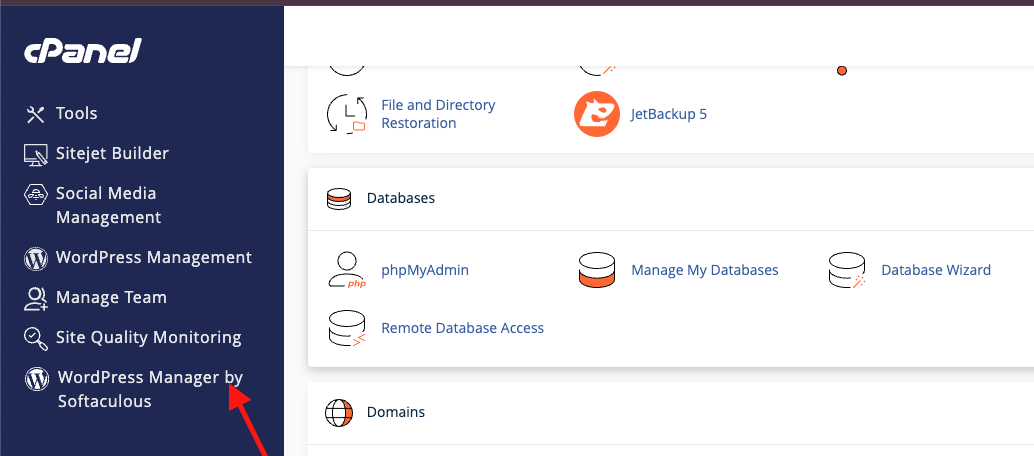
Step 3: Select WordPress
-
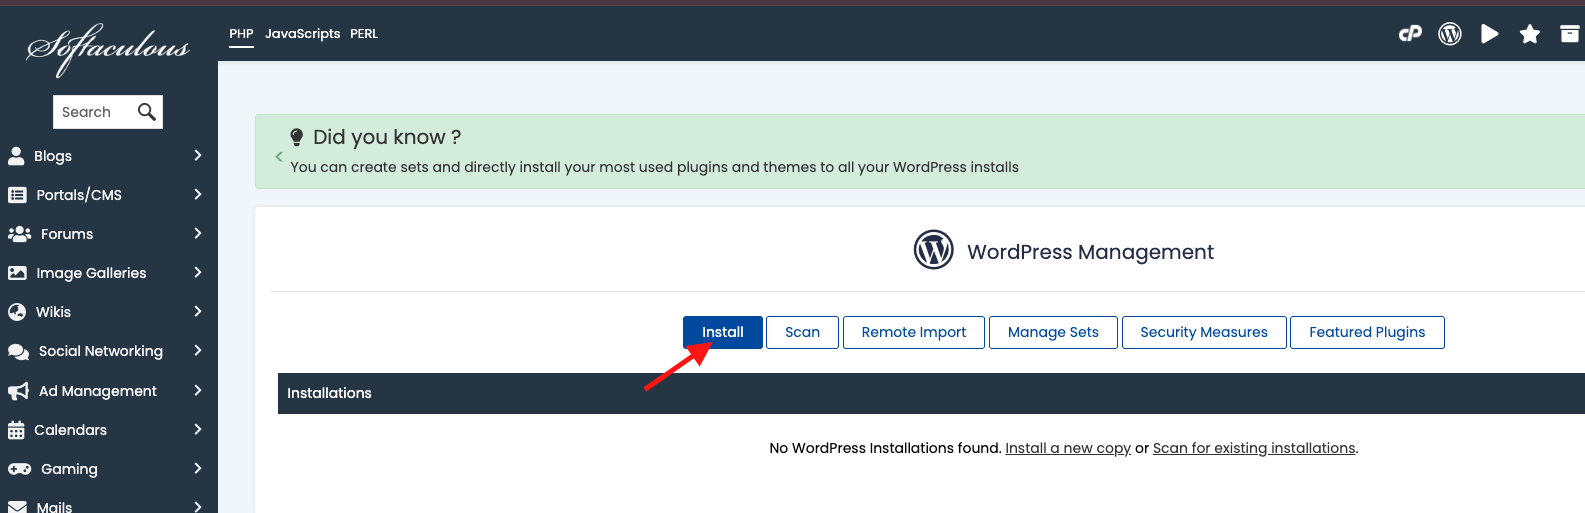
In Softaculous, click WordPress (usually shown on the homepage)
-
Click the Install Now button
Step 4: Configure Installation Settings
Software Setup
-
Choose Protocol:
https://(recommended) -
Choose Domain: Select the domain where you want WordPress installed
-
In Directory:
-
Leave empty to install on main domain (example:
example.com) -
Use a folder name (e.g.
blog) to install onexample.com/blog
-
Leaving this field empty is important if you want WordPress on the homepage.
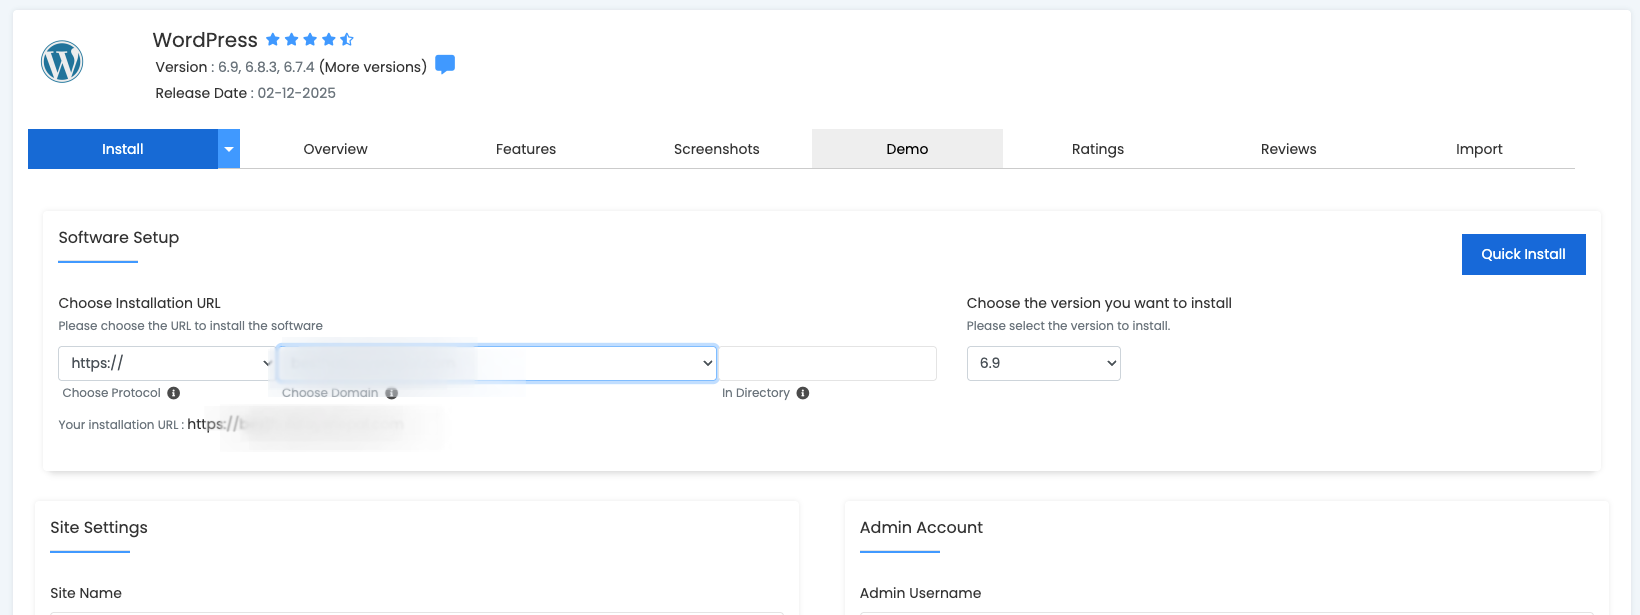
Site Settings
-
Site Name: Your website name
-
Site Description: Short description (can be changed later)
Admin Account
-
Admin Username: Choose a secure username (avoid
admin) -
Admin Password: Strong password
-
Admin Email: Your valid email address
Select Language
-
Choose your preferred language (English recommended)
Step 5: Install WordPress
-
Scroll down and click Install
-
Wait for the installation to complete (usually 30–60 seconds)
Once completed, you will see:
-
Website URL
-
Admin login URL (
/wp-admin)
Accessing WordPress Dashboard
-
Website:
https://yourdomain.com -
Admin Panel:
https://yourdomain.com/wp-admin
Login using the admin credentials you set during installation.
Common Mistakes to Avoid
-
Do not enter anything in the Directory field unless needed
-
Do not use weak admin passwords
-
Do not install WordPress before domain DNS is active
Conclusion
Using Softaculous is the quickest and safest way to install WordPress. Once installed, you can start customizing themes, installing plugins, and building your website immediately.
If you need further assistance, contact our support team.
