








Data loss can happen unexpectedly whether due to accidental deletion, website errors, or other unforeseen issues. That’s why Prabhu Host provides you with JetBackup 5, a powerful tool integrated into cPanel that allows you to restore files, databases, and even entire accounts with just a few clicks.
With up to 30 days of automated backups available, JetBackup 5 ensures you always have a reliable fallback. In this guide, we’ll walk you through the steps to restore or download your website data using JetBackup 5 so you can manage your site with confidence and peace of mind.
1. Accessing the JetBackup 5 Tool
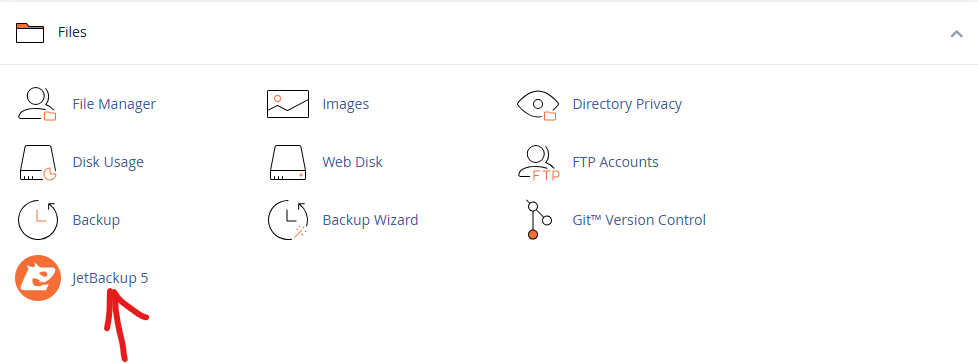
- First, log in to your cPanel account provided by Prabhu Host. Once inside, scroll down to the "Files" section and click on the JetBackup 5 icon. This will open the backup dashboard, where you can easily manage available backups and perform file or database restorations.
2. Restoring Files:
- Step 1: Navigate to the Home directory
Once inside JetBackup 5, access the Home directory by selecting the date from which you want to restore your files. JetBackup 5 offers a user-friendly calendar-based interface to choose the appropriate backup date.
- Step 2: Select "public_html" or relevant folder
Depending on your needs, select either the "public_html" folder for your main site or choose the relevant folder for addon domains or subdomains. - Step 3: Show hidden files
For a comprehensive restoration, consider selecting the "Show hidden files" option. This ensures that files like .htaccess and .env, which usually have a dot at the beginning, are also restored.

- Step 4: Restore or Download files
After selecting the desired date and folder, you have two options: "Restore" or "Download" the files. If you want to save the backup locally on your computer, choose "Download." On the other hand, if you wish to restore the files to your live website, click "Restore." 
- Step 5: Complete the process
If you opted to download the backup, go to "Downloads" and save the backup file. For restoration, please be patient as the process may take a few minutes depending on the content size." - Once completed, you should see the status as "Completed.

Restoring Databases:
- Step 1: Access JetBackup 5 and databases
Head to JetBackup 5 and select the "databases" option from the menu. Here, you will find a list of your databases if you have multiple ones. 
- Step 2: Choose the database to restore
Double-check and select the correct database you wish to restore or download. - Step 3: Restore or Download the database
Select the date from which you want to restore or download the database. If you are restoring a WordPress site from a backup, remember to restore the site database afterward.
With JetBackup 5 integrated into Prabhu Host's web hosting in Nepal, restoring lost or corrupted data becomes effortless. Whether you're managing a WordPress, Laravel, Python, Node.js, or Django project, JetBackup 5 provides a reliable way to recover critical files and databases in just a few clicks. This powerful tool gives you peace of mind, knowing your website's data is secure and always retrievable so you can stay focused on growing your online presence.
